Lightmap Parameters
The Lightmap Parameters Asset is used to store a set of values for the parameters which control Unity’s Global Illumination (GI) features. They allow you to define and save different sets of values for lighting, for use in different situations. Upon creation, they are stored in your Project folder, and can be accessed via the Project window.
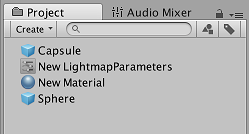
Lightmap Parameters Assets allow you to quickly create presets optimized for different types of GameObjects, or for different platforms and different Scene types (for example, indoor or outdoor Scenes).
When you click on a Lightmap Parameters Asset in the Project window, the Inspector window displays the values defined in that Asset. The parameters and their descriptions are listed in the table below.
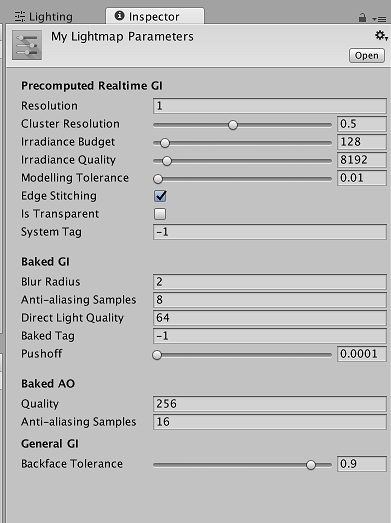
| Property | Function |
|---|---|
| Precomputed Realtime GI | |
| Resolution | This value scales the Realtime Resolution value in the Scene tab of the Lighting Window (menu: Window > Lighting > Scene) to give the final resolution of the lightmap in texels per unit of distance. |
| Cluster Resolution | The ratio of the cluster resolution (the resolution at which the light bounces are calculated internally) to the final lightmap resolution. See documentation on GI Visualizations in the Scene view for more information. |
| Irradiance Budget | This value determines the precision of the incoming light data used to light each texel in the lightmap. Each texel’s lighting is obtained by sampling a “view” of the Scene from the texel’s position. Lower values of irradiance budget result in a more blurred sample. Higher values increase the sharpness of the sample. A higher irradiance budget improves the lighting, but this increases run-time memory usage and might increase CPU usage. |
| Irradiance Quality | Use the slider to define the number of rays that are cast and used to compute which clusters affect a given output lightmap texel. Higher values offer visual improvements in the lightmap, but increase precomputing time in the Unity Editor. The value does not affect runtime performance. |
| Backface Tolerance | The structure of a Mesh sometimes causes some texels to have a “view” that includes back-facing geometry. Incoming light from a backface is meaningless in any Scene. Because of this, this property lets you select a percentage threshold of light that must come from front-facing geometry in order for a texel to be considered valid. Invalid texels have their lighting approximated from their neighbors’ values. Lowering this value can solve lighting problems caused by incoming light from backfaces. |
| Modelling Tolerance | This value controls the minimum size of gaps in Mesh geometry that allows light to pass through. Make this value lower to allow light to pass through smaller gaps in your environment. |
| Edge Stitching | If enabled, this property indicates that UV charts in the lightmap should be joined together seamlessly, to avoid unwanted visual artifacts. |
| Is Transparent | If enabled, the object appears transparent during the Global Illumination calculations. Back-faces do not contribute to these calculations, and light travels through the surface. This is useful for invisible emissive surfaces. |
| System Tag | A group of objects whose lightmap Textures are combined in the same lightmap atlas is known as a “system”. The Unity Editor automatically defines additional systems and their accompanying atlases if all the objects can’t be fitted into a single atlas. However, it is sometimes useful to define separate systems yourself (for example, to ensure that objects inside different rooms are grouped into one system per room). Change the System Tag number to force new system and lightmap creation. The exact numeric sequence values of the tag are not significant. |
| Baked GI | |
| Blur Radius | The radius of the blur filter that is applied to direct lighting during post-processing in texels. The radius is essentially the distance over which neighboring texels are averaged out. A larger radius gives a more blurred effect. Higher levels of blur tend to reduce visual artifacts but also soften the edges of shadows. |
| Antialiasing Samples | The degree of anti-aliasing (the reduction of “blocky” artifacts) that is applied. Higher numbers increase quality and bake time. |
| Direct Light Quality | The number of rays used to evaluate direct lighting. A higher number of rays tends to produce more accurate soft shadows but increases bake time. |
| Baked Tag | Similar to the System Tag property above, this number lets you group specific sets of objects together in separate baked lightmaps. As with the System Tag, the exact numeric value is not significant. Objects with different Baked Tag values are never put in the same atlas; however, there is no guarantee that objects with the same tag end up in the same atlas, because those objects might not necessarily fit into one lightmap (see image A, below, for an example of this). You don’t have to set this when using the multi-scene bake API, because grouping is done automatically (use the Baked Tag to replicate some of the behavior of the Lock Atlas option). |
| Pushoff | The distance to push away from the surface geometry before starting to trace rays in modelling units. It is applied to all baked lightmaps, so it affects direct light, indirect light, and AO. Pushoff is useful for getting rid of unwanted AO or shadowing. Use this setting to solve problems where the surface of an object is shadowing itself, causing speckled shadow patterns to appear on the surface with no apparent source. You can also use this setting to remove unwanted artifacts on huge objects, where floating point precision isn’t high enough to accurately ray-trace fine detail. |
| Baked AO | |
| Quality | The number of rays cast when evaluating ambient occlusion (AO). A higher numbers of rays increases AO quality but also increases bake time. |
| Antialiasing Samples | The number of samples to take when doing anti-aliasing of AO. A higher number of samples increases the AO quality but also increases the bake time. |
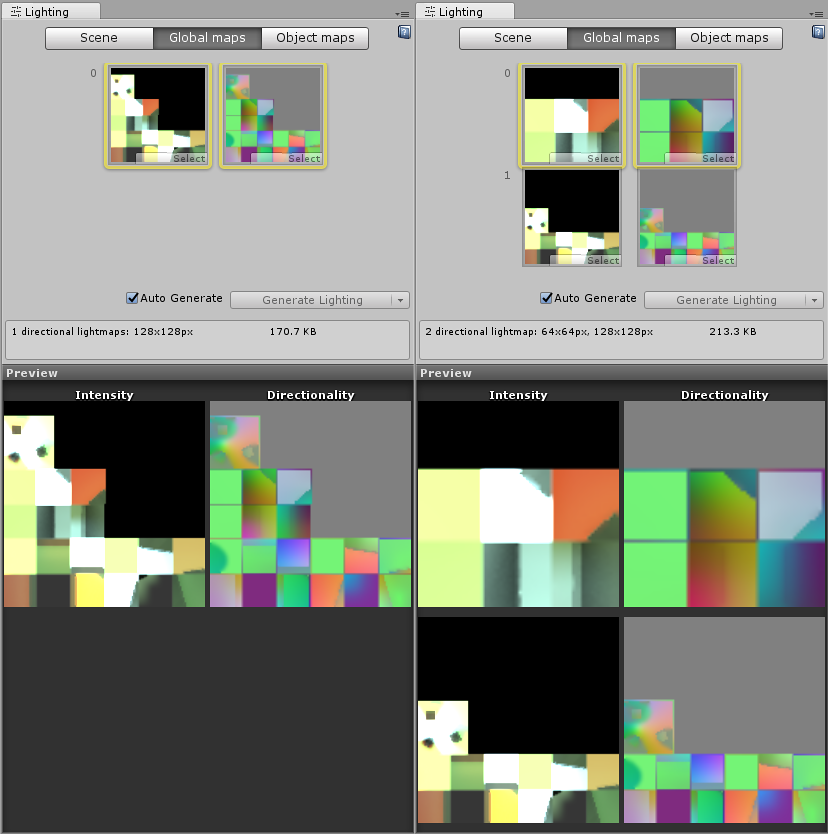
Image A shows two views of the same Scene:
Left: Everything is in one atlas because all the objects have the same Baked Tag.
Right: One object is forced into a second lightmap by assigning a different Baked Tag.
Assigning Lightmap Parameters Assets
Scenes
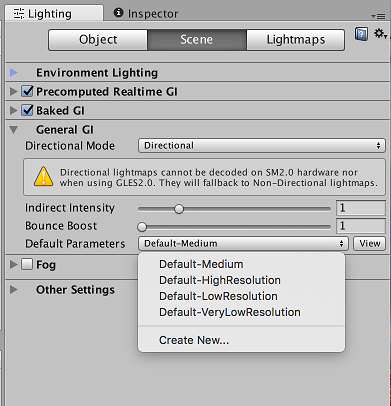
To assign a Lightmap Parameters Asset to the whole Scene, go to Window > Lighting to open the Lighting window. Here, click the Scene tab and navigate to the General GI settings.
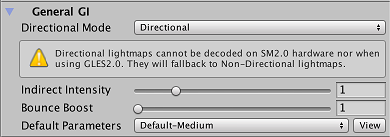
Use the Default Parameters drop-down to assign a default Lightmap Parameters Asset. This drop-down lists all available Lightmap Parameters Assets.
GameObjects
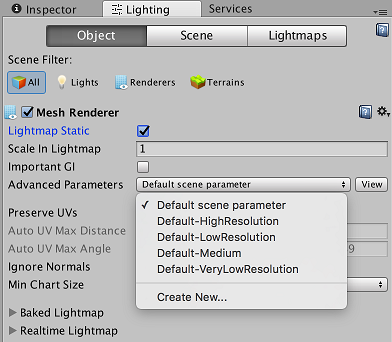
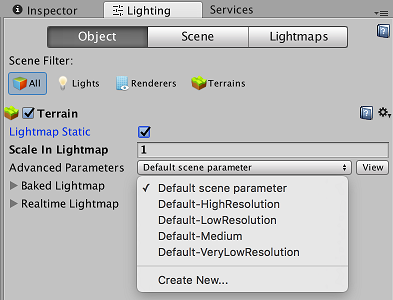
To assign a Lightmap Parameters Asset to a single GameObject, ensure the GameObject has a Mesh Renderer or Terrain component attached. Select the GameObject then open the Lighting window (menu: Window > Lighting) and select the Object tab.
To assign a Lightmap Parameters Asset to a Mesh Renderer, tick the Lightmap Static checkbox and select an option from Advanced Parameters. Choose Default scene parameter if you want to use the same Lightmap Parameters Asset that is assigned to the whole Scene.
To assign a Lightmap Parameters Asset to a Terrain, tick the Lightmap Static checkbox and select an option from Advanced Parameters. Choose Default scene parameter if you want to use the same Lightmap Parameters Asset that is assigned to the whole Scene.
Creating and adjusting a Lightmap Parameter Asset
To create a new Lightmap Parameters Asset, click Create New… from the list of available Lightmap Parameters Assets. When you do this, the Lighting window changes to display a list of properties for you to create a custom Lightmap Parameters Asset. This window has the same properties as the ones you see in the Inspector window when you select the Lightmap Parameters Asset in the Project window.