Animating a Game Object
Once you have saved the new Animation clip Asset, you are ready to begin adding keyframes to the clip. To begin editing an Animation Clip for the selected Game Object, click on the Animation Record button. This will enter Animation Record Mode, where changes to the Game Object are recorded into the Animation Clip.

You can stop the Animation Record Mode at any time by clicking the Animation Mode button again. This will revert the Game Object to the state it was in prior to entering the Animation Mode.
The changes you make to the GameObject will be recorded as keyframes at the current time shown by the red line in the Animation Window.
You can animate any property of the object by manipulating the object while in Animation Record Mode. Moving, Rotating or Scaling the object will add corresponding keyframes for those properties in the animation clip. Adjusting values directly in the object’s inspector will also add keyframes while in Record mode. This applies to any property in the inspector, including numeric values, checkboxes, colours, and most other values.
Any animated properties of the GameObject are shown listed in the property list on the left-hand side of the Animation Window. Properties which are not animated are not shown in this window. Any new properties that you animate, including properties on child objects, are added to the property list area as soon as you start animating them.
Transform properties are special in that the .x, .y, and .z properties are linked, so that curves are added three at a time.
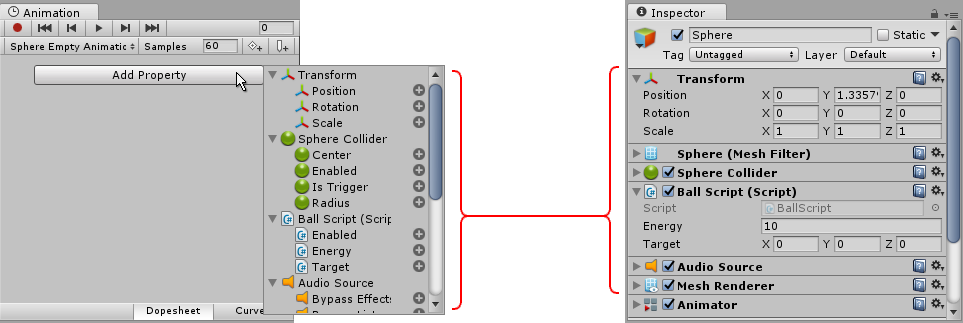
You can also add animatable properties to the current GameObject (and its children) by clicking the Add Property button. Clicking this button shows a pop up list of the GameObject’s animatable properties. These correspond with the properties you can see listed in the inspector.

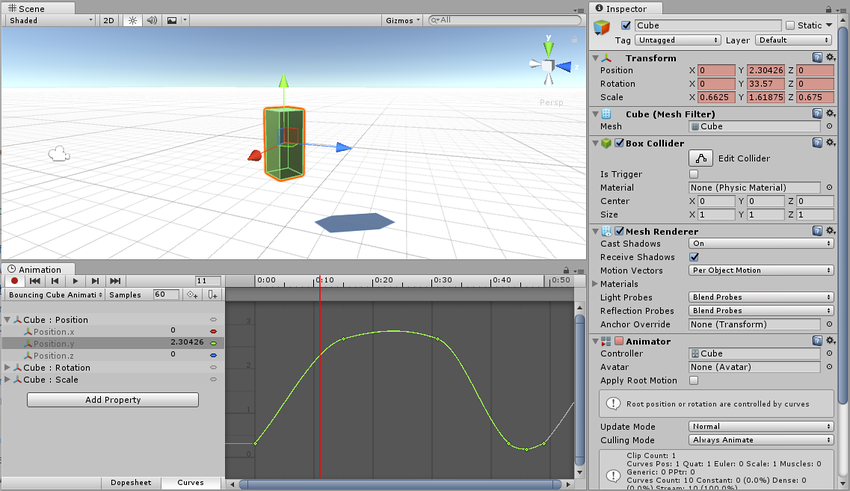
When in Animation Mode, a red vertical line will show which frame of the Animation Clip is currently previewed. The Inspector and Scene View will show the Game Object at that frame of the Animation Clip. The values of the animated properties at that frame are also shown in a column to the right of the property names.
In Animation Mode a red vertical line shows the currently previewed frame.

Time Line
You can click anywhere on the Time Line to preview or modify that frame in the Animation Clip. The numbers in the Time Line are shown as seconds and frames, so 1:30 means 1 second and 30 frames.

Animation Mode
In Animation Mode you can move, rotate, or scale the Game Object in the Scene View. This will automatically create Animation Curves for the position, rotation, and scale properties of the Animation Clip if they didn’t already exist, and keys on those Animation Curves will automatically be created at the currently previewed frame to store the respective Transform values you changed.
You can also use the Inspector to modify any of the other animatable properties of the Game Object. This too will create Animation Curves as needed, and create keys on those Animation Curves at the currently previewed frame to store your changed values.
Keyframe Creation
You can manually create a keyframe using the Add Keyframe button. This will create a key for all the properties that are currently selected in the Animation View. This is useful for selectively adding keys to specific properties only.
